Organizing your lab’s freezer can be a massive undertaking — but one that will pay back in spades.Credit: Cavan Images/Alamy
Setting a personal New Year’s resolution is common, but what about a New Year’s resolution for your laboratory? One resolution that we can get behind is getting — and staying — organized. In the spirit of the winter weather, we suggest starting with your ‘cold’ storage. Your freezers house some of your most precious samples, and depending on the state of your lab’s, it might be time for a refresh.
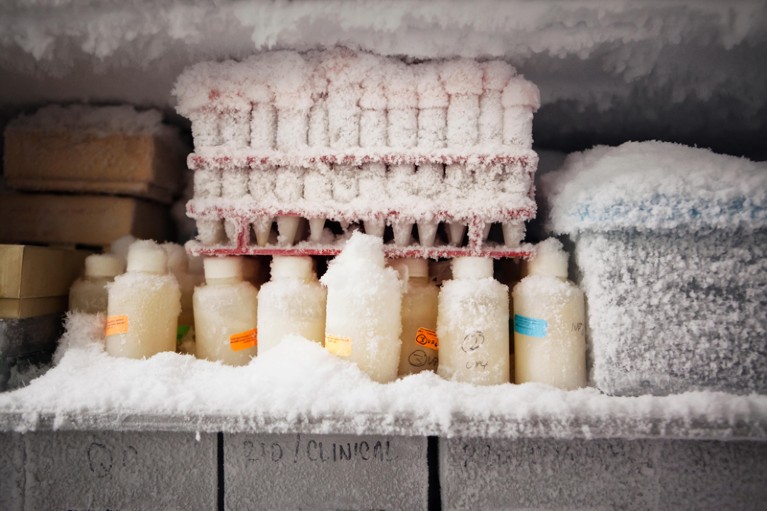
Launching an expedition into a –80 °C freezer in search of a reagent that the lab manager swears had been bought five years ago often results in wasted minutes, cold fingers, mountains of frost and incessant temperature alarms — and, if you’re lucky, the vial that you’re looking for.
It’s a universal experience, but it shouldn’t be. Not only are such searches a waste of time, but opening the door for extended periods can also harm the freezer and its contents. Taking time to organize and document your samples can minimize these inefficiencies and help lab members to monitor their inventory, simplify ordering and avoid duplicate purchases.

NatureTech
We created a freezer-organization system to help our lab keep track of where our materials are stored. Here, we describe our approach and provide practical advice for executing your own reorganization effort.
Assess
Each lab has different needs and different resources. As you contemplate a freezer reorganization, ask yourself:
Which items do you use most frequently?
What experiments do you perform, or which reagents do you use, that require long-term storage?
Are there distinct types of item that you store, such as plasmids, cell lines, human samples or proteins? Can you create subcategories that might improve your ability to find and retrieve samples easily?
Would it help to group all the materials for a particular type of experiment together?
Does each team member need their own dedicated space?
How much space will you need as you take more members on?
Plan
Bearing these questions in mind, decide how you will divide your space, and document what goes where. We created an inventory spreadsheet that details general rack storage and product information for each item. The spreadsheet was created in Microsoft Excel but can be adapted for other platforms, such as Google Sheets. Lab members can access the spreadsheet through Microsoft Teams, so everyone can see the most up-to-date inventory.
A little preparation made the reorganization process smoother.
Consider your physical space. We have an upright freezer with five vertical shelves. We reserved the top shelf for loose items, cell coolers and our ‘–80 °C inbox’, where we store new items temporarily before putting them where they belong. The remaining shelves each contain five metal freezer racks, each with five sliding drawers that can hold five freezer boxes. That’s enough space for 125 boxes, each containing 81 samples.
We organized that space using an alphanumeric code that uniquely identifies each box on the basis of where it is stored. For example, ‘Rack 1 (A) 5’ denotes an item that is stored in Rack 1, Drawer A, Box 5. We use an inexpensive thermal printer to create cryogenic labels that will adhere to cold items for the racks, drawers and boxes.
Choose an organizational scheme. To organize our space, we adopted a pyramid model. We chose a few broad categories for storage, set up more-specific subcategories, and finally selected precise boxes for small families of reagents (such as lentiviral particles for overexpressing, knocking down or knocking out genes). We dedicated one rack per shelf for mouse reagents, one for human reagents and one for miscellaneous items. Some of the species-specific items have similar names, so we use purple boxes for mouse-specific reagents, and green boxes for human ones. This provides a visual cue to help ensure that people grab the correct box. In each shelf, racks 4 to 16 are left empty, to give us space to grow.
In each rack, the drawers are dedicated to specific categories, such as cytokines, lentiviruses or glycerol stocks. The drawers contain boxes that are dedicated to reagents from frequently used vendors or that are designed for specific applications. This scheme makes it easy for our lab members to intuit where a product should be stored.
Document what goes where. Finally, you need to log where everything goes, so lab members can see exactly what is in the freezer without having to dig through it. All members should modify the spreadsheet as necessary. After finishing off a reagent, for instance, users can delete it from the sheet; when new materials come in, they can be added. This maintains the integrity of the spreadsheet and ensures that responsibility for documentation is shared equally. To adapt our sheet for your own use, visit Organizō (a company that C.M.T. established in early 2023 to provide lab-organization tools) to download a blank, editable version for free.
The spreadsheet has several tabs. The first tab provides an overview of the organizational system; subsequent ones detail the organization of the materials in a single rack and drawer (such as Rack 1 Drawer A). In the ‘Drawer’ tabs, each box has a 9 × 9 block of cells dedicated to it, which detail what samples are in each sample slot. For every sample, we document the reagent name; its concentration, vendor, catalogue number and date added; and the initials of who added it.
Although it might seem like overkill, documenting these details makes reordering much easier. It also serves as a backup in case physical labels become unreadable over time, and improves experimental planning. In our freezer, for instance, the most abundant items are stocks of genetically modified lentiviruses.
Previously, when planning an experiment, we would have to retrieve a vial, confirm its target and manually look up its concentration before we could use it. Now we can work out all these details in advance without the risk of damaging the sample itself. Discuss with your team what information you need to document to simplify your own research.
Move
If you plan to reorganize your cold storage on the basis of this (or any other) organizational scheme, remember that freeze–thaw cycles can reduce the quality of certain reagents, or even destroy them. Therefore, moving everything before it thaws should be a top priority. We reorganized only two or three boxes at a time and kept our boxes on ice to keep everything as cold as possible.
Although this extended the entire process, it was ultimately worth it to preserve the integrity of our research materials.
We recognize that organizing the lab freezers is a massive undertaking. But organization is a gift that keeps on giving all year long. So don’t wait — resolve to get organized, stay organized and make your –80 °C freezer goals your lab’s new reality.